Strategic Pet Recovery
Strategy - Technique - Tools
Field Proven Skills to Recover Lost Pets
““I care not for a man's religion whose dog and cat are not the better for it.”  Abraham Lincoln

Technique: Commence Recovery - the regaining of something lost or taken away

 
Recovery 1-2-3
The basic steps for recovery occur in three steps, 1) select location, 2) verify presence and 3) trap the dog.


1 - Select Location
When you have worked through the preceding techniques and your efforts have garnered verified sightings, it's time to implement recovery actions. Selecting the correct location is key to trapping a dog.

The selected location should consider the dogs ability and desire to smell food within a quarter mile radius. This is fundamental to the trappaing of the dog.

Using your map and other information collected to view verified sighting locations, determine via analysis if the dog has established a pattern of travel and/or an area which the dog favors.  The location favored most by the dog, and/or within a quater mile radius from its last known position is your recovery location.

Sometimes, a single sighting is enough to initiate recovery actions if the dynamics are right.  When choosing the specific location, be sure to consider if it will accommodate the actions needed to recover the dog (e.g. As quiet and out of the way as possible, relatively level if a trap will be used, few distractions and so on).

Other factors you must consider are weather, proximity to streets and highways,  the privacy or security of the location, other animals that may be in the area, and any hazards that may exist.


2 - Verify The Dogs Presence
Verification  of the dogs presence will confirm your recovery location determination. It will also provide some intel for the location by capturing images of other animals or people that may be in the area when no one else is around to see. 

Make a Camera Trap
Position a trail camera (or similar camera) as close as possible to the location in which there is the most confidence that the dog favors or may be expected at a given time range based on sighting information.  Then place a small bowl of dog kibble, a separate smaller bowl of tuna, and a bowl of water within view of the camera (6' to 8').  Given that the weather is fair (i.e. no heavy rain or wind), a dog will smell the food within a quarter mile radius. The goal is to get the dog and food within that same radius.  These actions comprise a "camera trap".

Check the camera in four to eight hour increments (or more often as practical) to determine if the dog appeared. If the dog was captured on the camera, move on to the recovery actions. A wireless or remote camera is best as it can be checked more often without invading the dogs space to check the memory card on a trail camera.

If the dog is observed on camera, it is time to set a trap.

Relocate as Needed
If the dog did not appear on camera over a 24 hour period, relocate the camera, food and water (and replace with fresh kibble and tuna) to a new location, some place a little less than one-quarter mile away. Use your mapping  analysis to select the new location. 

Repeat for four days and adjust if new sightings occur. If no camera captures verify the dogs presence after four days then reassess and/or await new sightings and try again.


MOULTRIE DIGITAL GAME CAMERA
3 - Trap the Dog
Trapping a dog presumes you are familiar with the trap and the safe use of it. No trap should be left unattended for any extended period of time.

Preplan Your Actions
Always preplan and arrive fully equipped to manage and handle a trapped dog. To eliminate uncertainty, put your supplies in a single plastic storage container "trap supplies". It is better to be over equipped than to discover you are missing vital tools in the field. Rope, gloves, flashlight, dog food, can opener, water, extra bowls, extra batteries for the camera(s) and other necessities.

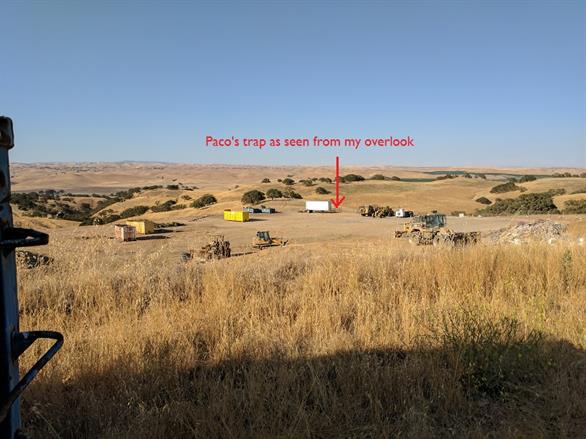
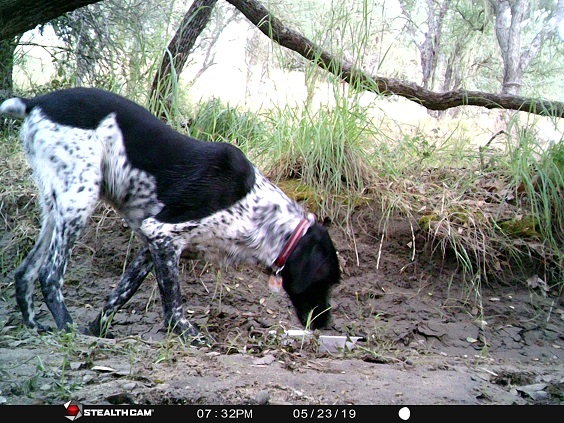
Place the trap at the selected location where the dogs presence has been verified. Move the kibble, tune and water inside the trap (make sure the kibble and tuna are fresh). Place your camera(s) to monitor the trap. Doing so will allow you to see what went wrong if the dog did not enter the trap (e.g. dog did not appear, dog appeared but was afraid to enter the trap, trap did not activate properly and so on).

Preplan a location you can quietly observe and or listen for a trap activation. This should be downwind of the dog if possible (i.e. you don't want the dog to be able to smell you as it may keep the dog away).

Patience is Key
Give the dog lots of time to detect the presence of the food in the trap and to enter the trap. It may be one hour, or it could be eight hours or more. Arrived prepared to stay the amount of time needed (food, clothing, warmth). Silence any electronic devices you have, such as cell phone, radio, etc.).

After Trapping Actions
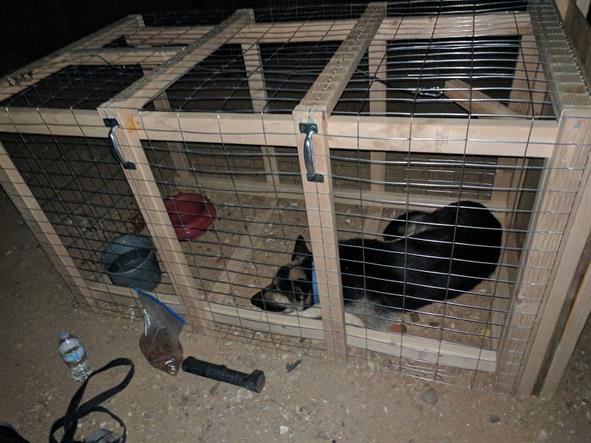
When the dog is trapped, make your presence known but be slow and gentle in your movements. Allow the dog to settle down, attempt to calm it with your voice and a few treats. Always use extreme caution with any trapped dog, do not assume that it will not bite you.

Once the dog has settled, it is time to transport the dog back to a safe and secure location. Ideally the dog would be transported in the trap directly to a secure area. Often this is not possible, so the dog ust be secured before getting it out of the trap. This must be practiced beforehand.  The best practice is to use two slip leashes. One goes around the dogs neck in the typical way. The other is looped around the dogs chest, just behind its front legs. Then the two leashes (or ropes) are tied together near the dogs neck, forming an ad hoc harness which the dog cannot escape.

Have a second individual open the trap door while you securely hold the leashes. Be prepared for the dog to bolt.  Even if the owner is present, do not remove the ad hoc harness until the dog is in a secure environment.